The Student Disability Resource Center (SDRC) is open during regular business hours, Monday-Friday, from 8:00am-5:00pm (except University Holidays and Closures, and periodic department training/in-service events). The SDRC may be reached at 951-827-3861 or sdrc@ucr.edu. To register for services, please visit this webpage. To request an appointment with a disability specialist, please go to the Appointment Request Form.
Accessible Word: Tables
Tables are very useful to organize data in a document and are commonly used in syllabi for schedules and grading methods. Not taking the proper steps to making a table accessible however, will make it very hard for non-visual users to understand the data.
When to Add a Table?
Tables should only be used when absolutely necessary in organizing data and should avoid being used for decorative purposes, such as for laying content out on a page.
Creating Accessible Tables
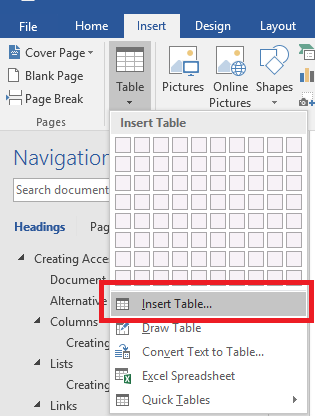
- Under the Insert tab, select Table: Insert Table. Do NOT use the Draw Table option.

Dialog box to Insert Table. - Enter how many rows and columns you want in the table.
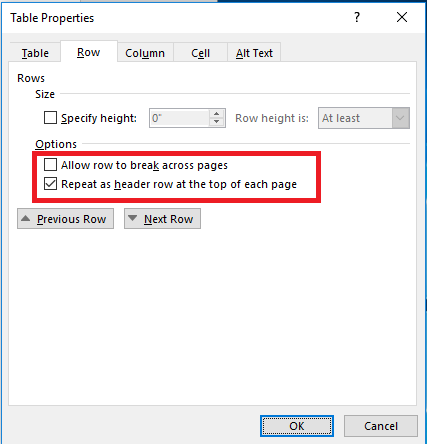
- Select the first (header) row of the table. Right-click for the context menu and choose Table Properties. Choose the Row tab.

Dialog box to repeat selected row as header. - Select (check) the option Repeat as a header row at the top of each page. Make sure that Allow row to break across pages is unchecked. While you're in the Table Properties menu, choose the Alt Text tab and add a Title and some Alternative Text.
- Select OK.